Flutter学习系列是自己学习Flutter的过程笔记
常用组件
Flutter提供了很多默认的组件,而每个组件的都继承自widget 。 在Flutter眼里:一切都是widget。
widget,作为可视化的UI组件,包含了显示UI、功能交互两部分。大的widget,也可以由多个小的widget组合而成。
Text
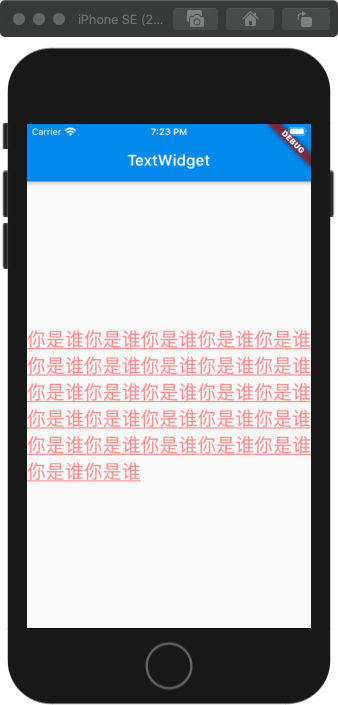
Text的样式,来自另一个widget:TextStyle。 而TextStyle里的color,又是另一个widget Color的实例。
1
2
3
4
5
6
7
8
9
10
11
12
| Text(
'你是谁你是谁你是谁你是谁你是谁你是谁你是谁你是谁你是谁你是谁你是谁你是谁你是谁你是谁你是谁你是谁你是谁你是谁你是谁你是谁你是谁你是谁你是谁你是谁你是谁你是谁你是谁',
textAlign: TextAlign.left,
style: TextStyle(
fontSize: 25.0,
color: Color.fromARGB(255, 255, 150, 150),
decoration: TextDecoration.underline,
decorationStyle: TextDecorationStyle.solid,
),
)
|

Container
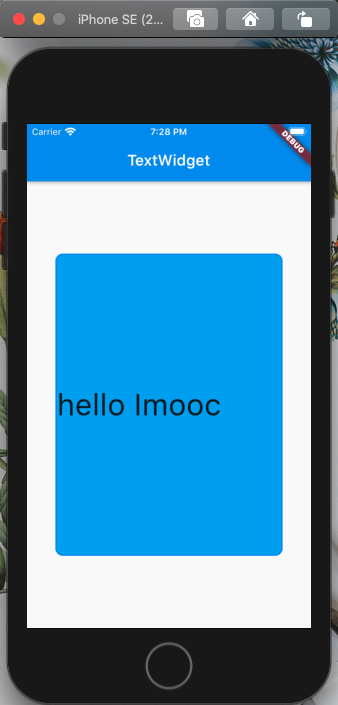
Container是非常常用的一个widget,一般是用作一个容器,类似html的div标签
基础属性:width,height,color,child
1
2
3
4
5
6
7
8
9
10
11
12
13
14
15
16
17
18
19
20
21
22
23
| Container(
child: new Text(
'hello Imooc',
style: TextStyle(
fontSize: 40.0,
),
),
alignment: Alignment.centerLeft,
width: 300.0,
height: 400.0,
padding: const EdgeInsets.fromLTRB(10.0, 30.0, 0.0, 0.0),
margin: const EdgeInsets.all(10.0),
decoration: BoxDecoration(
color: Colors.lightBlue,
border: Border.all(
color: Colors.blue,
width: 2.0,
),
borderRadius: BorderRadius.all(
Radius.circular(10),
)
),
)
|

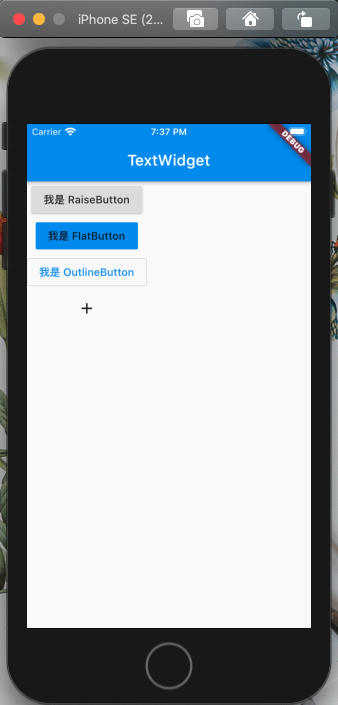
Flutter 的 Button 有好几种类型
- RaisedButton: 凸起的按钮
- FlatButton:扁平化按钮
- OutlineButton:带边框按钮
- IconButton:带图标按钮
- Scaffold组件下的floatingActionButton可是设置界面上浮动的按钮,floatingActionButtonLocation可以设置按钮的位置
1
2
3
4
5
| floatingActionButton: FloatingActionButton(
child: Icon(Icons.add),
onPressed: () {},
),
floatingActionButtonLocation: FloatingActionButtonLocation.centerFloat,
|
1
2
3
4
5
6
7
8
9
10
11
12
13
14
15
16
17
18
19
20
| Column(children: <Widget>[
RaisedButton(
child: Text("我是 RaiseButton"),
onPressed: () {},
),
FlatButton(
child: Text("我是 FlatButton"),
color: Colors.blue,
onPressed: () {},
),
OutlineButton(
child: Text("我是 OutlineButton"),
textColor: Colors.blue,
onPressed: () {},
),
IconButton(
icon: Icon(Icons.add),
onPressed: () {},
)
]),
|

TextField
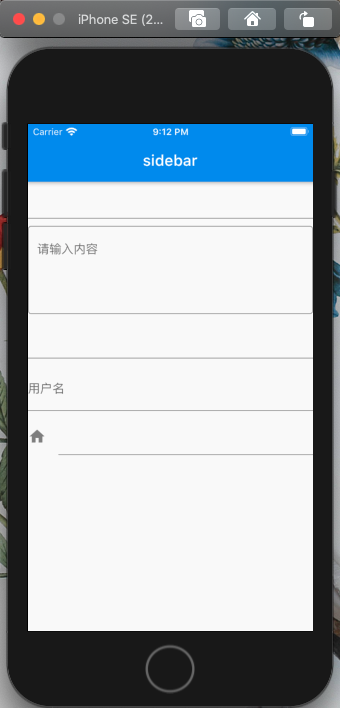
html中的输入框组件在flutter中是TextField组件,一下列举了几种常见的输入框
1
2
3
4
5
6
7
8
9
10
11
12
13
14
15
16
17
18
19
20
21
22
23
24
25
26
27
28
29
30
31
32
33
34
35
36
37
38
39
40
41
42
| Column(
children: <Widget>[
TextField(),
SizedBox(height: 10),
TextField(
maxLines: 4,
decoration: InputDecoration(
hintText: "请输入内容",
border: OutlineInputBorder(),
),
),
SizedBox(height: 10),
TextField(
obscureText: true,
),
SizedBox(height: 10),
TextField(
decoration: InputDecoration(
labelText: '用户名',
),
),
SizedBox(height: 10),
TextField(
decoration: InputDecoration(
icon: Icon(Icons.home),
),
),
],
)
|

Input组件状态控制:TextField组件的onChanged函数可以监听输入框值的变化
1
2
3
4
5
6
7
8
9
10
11
12
13
14
15
16
17
18
19
20
21
22
23
24
25
26
27
28
29
| class InputController extends StatefulWidget {
InputController({Key key}) : super(key: key);
_InputControllerState createState() => _InputControllerState();
}
class _InputControllerState extends State<InputController> {
var userName;
@override
Widget build(BuildContext context) {
return Column(
children: <Widget>[
TextField(
onChanged: (value) {
setState(() {
this.userName = value;
});
},
),
RaisedButton(
child: Text('提交'),
onPressed: () {
print(this.userName);
},
),
],
);
}
}
|
Checkbox
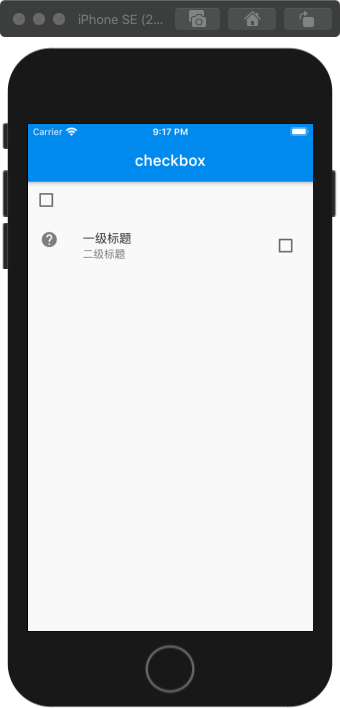
Checkbox组件以及状态控制
1
2
3
4
5
6
7
8
9
10
11
12
13
14
15
16
17
18
19
20
21
22
23
24
25
26
27
28
29
30
31
32
33
34
35
36
37
38
39
40
| class CheckboxComponeng extends StatefulWidget {
CheckboxComponeng({Key key}) : super(key: key);
_CheckboxComponengState createState() => _CheckboxComponengState();
}
class _CheckboxComponengState extends State<CheckboxComponeng> {
bool flag = false;
@override
Widget build(BuildContext context) {
return Scaffold(
appBar: AppBar(
title: Text('checkbox'),
),
body: Wrap(
children: <Widget>[
Checkbox(
value: this.flag,
onChanged: (value) {
setState(() {
this.flag = value;
});
},
),
CheckboxListTile(
value: this.flag,
onChanged: (value) {
setState(() {
this.flag = value;
});
},
title: Text('一级标题'),
subtitle: Text('二级标题'),
secondary: Icon(Icons.help),
),
],
),
);
}
}
|

Radio
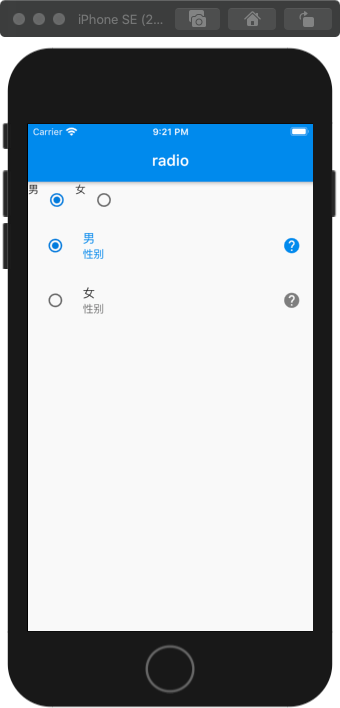
Radio组件以及状态控制
1
2
3
4
5
6
7
8
9
10
11
12
13
14
15
16
17
18
19
20
21
22
23
24
25
26
27
28
29
30
31
32
33
34
35
36
37
38
39
40
41
42
43
44
45
46
47
48
49
50
51
52
53
54
55
56
57
58
59
60
61
62
63
64
65
66
67
68
| class RadioComponeng extends StatefulWidget {
RadioComponeng({Key key}) : super(key: key);
_RadioComponengState createState() => _RadioComponengState();
}
class _RadioComponengState extends State<RadioComponeng> {
int sex = 1;
@override
Widget build(BuildContext context) {
return Scaffold(
appBar: AppBar(
title: Text('radio'),
),
body: Wrap(
children: <Widget>[
Text('男'),
Radio(
value: 1,
groupValue: this.sex,
onChanged: (value) {
setState(() {
this.sex = value;
});
},
),
Text('女'),
Radio(
value: 2,
groupValue: this.sex,
onChanged: (value) {
setState(() {
this.sex = value;
});
},
),
RadioListTile(
value: 1,
groupValue: this.sex,
onChanged: (value) {
setState(() {
this.sex = value;
});
},
selected: this.sex == 1,
title: Text('男'),
subtitle: Text('性别'),
secondary: Icon(Icons.help),
),
RadioListTile(
value: 2,
groupValue: this.sex,
onChanged: (value) {
setState(() {
this.sex = value;
});
},
selected: this.sex == 2,
title: Text('女'),
subtitle: Text('性别'),
secondary: Icon(Icons.help),
),
],
),
);
}
}
|

Switch
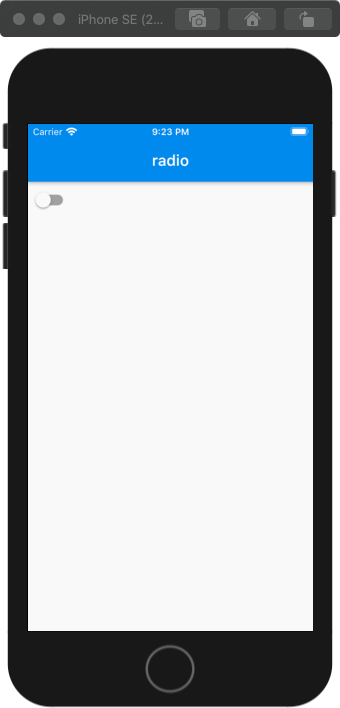
Switch组件以及状态控制
1
2
3
4
5
6
7
8
9
10
11
12
13
14
15
16
17
18
19
20
21
22
23
24
25
26
27
28
29
30
|
class SwitchComponeng extends StatefulWidget {
  SwitchComponeng({Key key}) : super(key: key);
  _SwitchComponengState createState() => _SwitchComponengState();
}

class _SwitchComponengState extends State<SwitchComponeng> {
  bool flag = false;

  @override
  Widget build(BuildContext context) {
    return Scaffold(
      appBar: AppBar(
        title: Text('radio'),
      ),
      body: Wrap(
        children: <Widget>[
          Switch(
            value: this.flag,
            onChanged: (value) {
              setState(() {
                this.flag = value;
              });
            },
          ),
        ],
      ),
    );
  }
}
|

Image
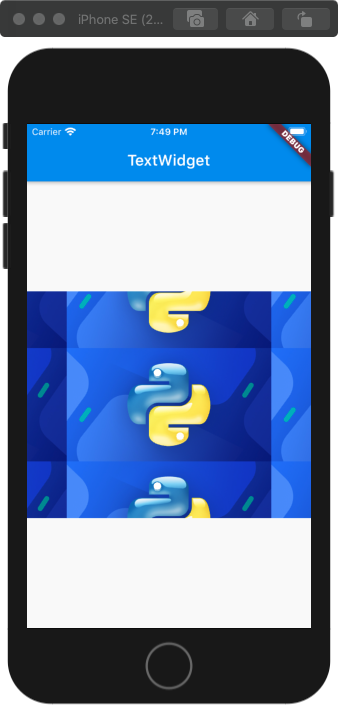
网络图片加载:使用NetworkImage,可以做网络图片的加载
1
2
3
4
5
6
7
8
9
10
11
| Container(
child: new Image.network(
'https://img4.mukewang.com/szimg/59b8a486000107fb05400300.jpg',
scale: 2.0,
repeat: ImageRepeat.repeat,
),
width: 400.0,
height: 300.0,
color: Colors.lightBlue,
)
|

本地图片引入需要配置pubspec.yaml文件,使用AssetImage类
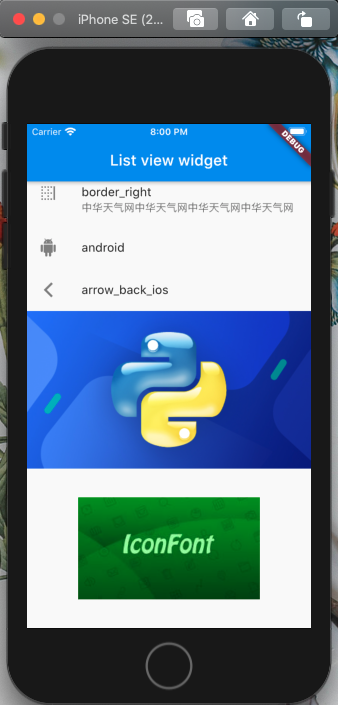
ListView
横向列表
1
2
3
4
5
6
7
8
9
10
11
12
13
14
15
16
17
18
19
| ListView(
children: <Widget>[
ListTile(
leading: Icon(Icons.border_right),
title: Text('border_right'),
subtitle: Text('中华天气网中华天气网中华天气网中华天气网'),
),
ListTile(
leading: Icon(Icons.android),
title: Text('android'),
),
ListTile(
leading: Icon(Icons.arrow_back_ios),
title: Text('arrow_back_ios'),
),
Image.network('https://img4.mukewang.com/szimg/59b8a486000107fb05400300.jpg'),
Image.network('https://img1.mukewang.com/5cfdd215089d136306000338-240-135.jpg'),
],
)
|

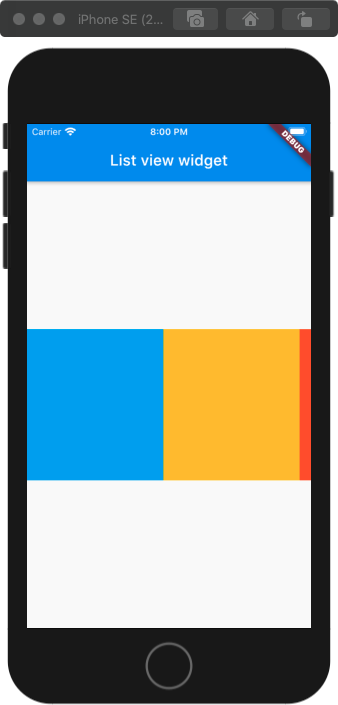
纵向列表
scrollDirection属性可以设置列表主轴方向
1
2
3
4
5
6
7
8
9
10
11
12
13
14
15
16
17
18
19
20
21
| ListView(
scrollDirection: Axis.horizontal,
children: <Widget>[
new Container(
width: 180.0,
color: Colors.lightBlue,
),
new Container(
width: 180.0,
color: Colors.amber,
),
new Container(
width: 180.0,
color: Colors.deepOrange,
),
new Container(
width: 180.0,
color: Colors.deepPurpleAccent,
),
],
)
|

动态列表
1
2
3
4
5
6
7
8
9
10
11
12
13
14
15
16
17
18
19
20
21
22
23
| class MyApp extends StatelessWidget {
@override
Widget build(BuildContext context) {
List<String> items = ['1', '2', '3'];
return MaterialApp(
title: 'List view widget',
home: Scaffold(
appBar: AppBar(
title: Text('List view widget'),
),
body: new ListView.builder(
itemCount: items.length,
itemBuilder: (context, index) {
return new ListTile(
title: new Text('${items[index]}'),
);
},
)
),
);
}
}
|
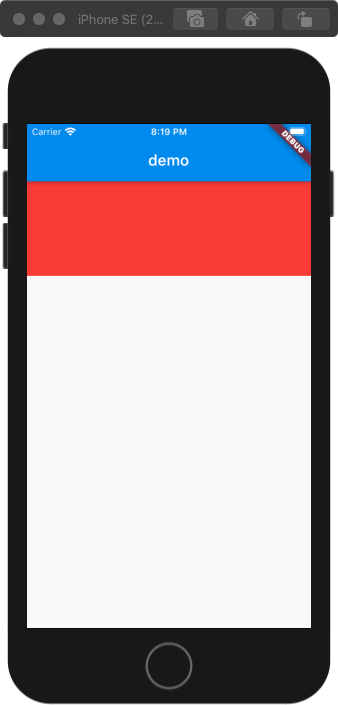
AspectRatio 可设置宽高比
AspectRatio组件的宽度和父容器一致,再按照宽高比展示高度
1
2
3
4
5
6
| AspectRatio(
aspectRatio: 3.0/1.0,
child: Container(
color: Colors.red,
),
)
|

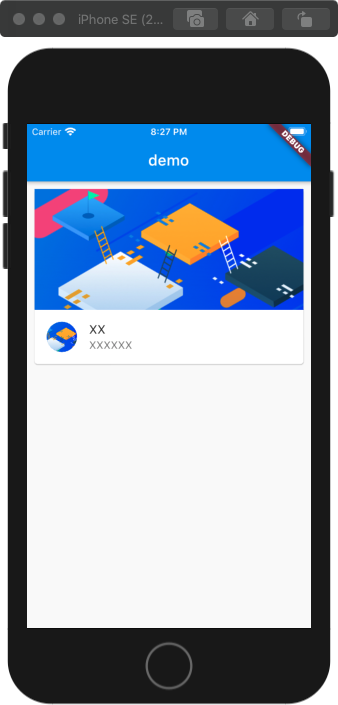
Card
card是常用的卡片信息展示组件
1
2
3
4
5
6
7
8
9
10
11
12
13
14
15
16
17
18
19
20
21
22
23
24
25
| ListView(
children: <Widget>[
Card(
margin: EdgeInsets.all(10),
child: Column(
children: <Widget>[
AspectRatio(
aspectRatio: 20/9,
child: Image.network(
'https://img1.mukewang.com/szimg/5ad05dc00001eae705400300.jpg',
fit: BoxFit.cover,
),
),
ListTile(
leading: CircleAvatar(
backgroundImage: NetworkImage('https://img1.mukewang.com/szimg/5ad05dc00001eae705400300.jpg'),
),
title: Text('XX'),
subtitle: Text('XXXXXX'),
),
],
),
),
],
)
|

